
Formatting is one of those tools which catches many people out, because there are some rules of data entry which aren’t always made clear to beginners.
Part 1 – the basics
Firstly, as you can see in this gif, text always aligns to the left. If you have a mix of text and numbers – called alphanumeric – then it’ll align to the left.
Secondly, all numeric data aligns to the right. This includes dates and times, because behind the scenes, they are stored as numbers.
So why should I care? If you have a long column of numbers and you suddenly spot something is over on the left, you’ve done something which makes Excel think it’s text. It’s a handy little feature for checking your data entry! Common mistakes might be having two dots in a number 52.31. instead of 52.31 or putting an O or o instead of a 0 (they’re actually pretty close on the keyboard, so this is commoner than you’d think).
So the big thing about this is, to start with at least, don’t overrule the default alignment – it can really help with spotting initial errors.

Part 2 – number formatting
In the following gif, I’ve walked through all of the commonest types of number formatting.
- In cell A1, I show you simple General number formatting, which then allows you to be able to increase or decrease your decimal places quickly.
- In cell A2, I apply Currency style formatting. As you can see, you automatically get a £ sign. (If you’re in a different country, your default currency symbol might be a $ or a €.)
- In cell A3, I apply a related format – Accounting. As you can see, the big difference is where your currency symbol is. With Acounting, it’s always way over on the left of the cell.
- In cell A4, I again apply Currency formatting. Now you can see an additional feature of the Accounting format – it’s set in a little bit from the right hand side. This is so that positive and negative numbers will still line up if you choose to show negatives in brackets rather than with a minus sign (1.00) rather than -1.00. I’ve covered how to do brackets in another post.
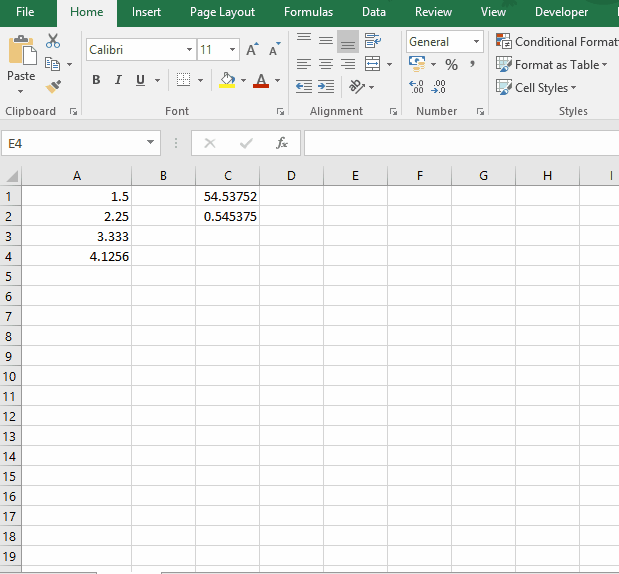
- In cell C1, I show you a formula which has been set up to calculate a percentage. It divides A2 by A4 then multiplies by 100, which is what we do for a percentage, right? However, it looks like a normal number which could cause other users to think it’s something else, like money with a crazy amount of decimal places rather than an actual percentage. So…
- …in cell C2, rather than multiply by 100, I apply the Percentage formatting style. Now you can see I have a % symbol, and of course I can adjust the decimal places up and down. Note that as I adjust the decimal places, Excel automatically rounds up or down as appropriate.
- In cell C4, I apply Comma Style formatting, which places what’s called a ‘thousands separator’ in the number. Basically instead of 1234567 it shows 1,234,567 i.e. it’s separating the thousands with a comma. Applying this format automatically gives you two decimal places too, by the way.
- In cell E1 I show how not to enter a date. It seems surprisingly common to do dates this way, but as you can see, Excel treats it as text. The problem with this is if you want it to display in different ways, or even if you want to perform a calculation off the back of it. You could have a formula referring to the date saying +30 which would give you the latest date you’d need to apply for VAT if your turnover has gone over the threshold, for example. Very useful!
- In cell E2 I show you how it should be done. You use / (forward slash, never backslash) and it will automatically recognise that as a date. You can then apply a different form of formatting on it – here I choose Long Date which gives me the whole month name and the day with a leading zero (01 instead of just 1).
- In cell E7 I show you how not to enter time. Don’t use dots, because Excel treats it as a basic old number! Again, if you want to do calculations based off this, such as in timesheets, you’ve painted yourself into a very irritating corner. (Can you tell I’ve done this before?!)
- In cell E8 I show you how it should be done. Use the colon : to separate out your hours from your minutes. You can even apply formatting which will show the seconds, too.
Part 3 – getting rid
It’s important to bear in mind that your cell formatting is separate from the cell contents.
It’s sometimes been the case that I’ve been working away on a spreadsheet and suddenly one of my cells has formatted to a percentage or it’s gone blue or something. This is likely to be because someone was ‘doodling’ in a little corner of the spreadsheet, applied formatting, then later cleared the cell’s contents.
However, unbeknownst to you the formatting has been left behind, invisible, waiting to surprise you when you next put something in that cell!
If you want to strip off all formatting quickly and easily, go to your Home tab if you’re not already there, then have a look way off on the right of the ribbon – you’ll see a small button with a pink eraser called Clear. Click it for various options. I use this quite a bit.
![]()
Do have a play with a blank spreadsheet and all the different number format options.
Note in particular that when you apply Percentage formatting, it removes the need for you to have to multiply by 100 – that’s part and parcel of the formatting. I do sometimes forget even now, and then I end up with a ludicrously large percentage! Just remove the *100 from your formula.
Note also that when applying Time formatting, you need to train other users of the spreadsheet to recognise the importance of entering time how Excel requires, and not how they might be inclined to enter it. As an example imagine someone put 12.5 to mean ‘half past twelve’. Imagine then that someone has formatted it to have 2 decimal places (12.50). Can you see how that could easily be interpreted as “fifty minutes past twelve”, and not “half past twelve”? If you’re setting up timesheets it’s essential that you train people first. It’s in their interests anyway – a timesheet which Excel thinks is actually twelve fifty rather than twelve thirty might have cheated them of 20 minutes of pay (or worse, suggested that they worked 20 minutes longer than they actually did).
If you’re following the suggested Learning Plan, please click here to go to the next post.

3 thoughts on “Getting to grips with Formatting”